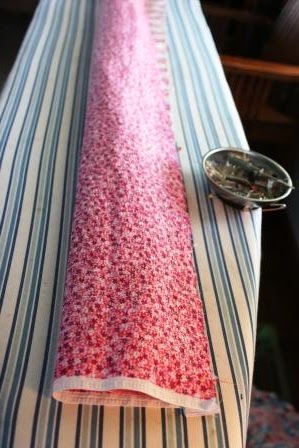
What I found most intriguing about these pillowcases is the absence of exposed seams on the inside. Now, I consider my self a pretty bright color in the crayola box of life. (Certainly not the brightest- day-glow orange, but a nice spring green for sure.) So, when the ladies at the quilt shop tried to explain how they hid the seam and I didn't understand the slightest bit, I thought: "If I read the instructions while I'm making it, I'm sure it'll make sense then." (If not a bright spring green, a confident red one then.)
I obviously got the pattern figured out, but I thought I would write up a little tutorial in case you wanted to try one yourself!
Pillowcase Tutorial

Materials:
3/4 yard main fabric
1/4 yard contrasting fabric for hem
2" accent for trim
For cheaper fabrics I purchase at chain stores, I pre-wash. I only pre-wash the better quality fabrics if I want to make sure the colors will not bleed, or if it feels a little "stiff". Use your best judgement.
For this project I also like to make sure I have super straight lines, so I tear the fabric instead of cutting. You can tear your fabric by making a snip through the selvage edge about an inch from the cut edge and holding each side and tearing apart quickly. If you are uncomfortable tearing, cut away!
Cut or tear your main fabric 25"
Cut or tear your hem fabric 10"
Cut or tear your trim fabric 2"
IMPORTANT NOTE! All cuts should be full width of fabric.
All seams should be 1/2" unless otherwise noted.
1. Fold trim fabric in half, wrong sides together matching cut/tear edges. Iron.

2. Lay out hem fabric, right side up with cut/torn edge horizontally in front of you. I use my ironing board.

3. Lay the trim piece on top of hem fabric matching cut/torn edges. The selvage edges may vary, I like the keep the overage/shortages at one end. See step # 9.

4. Place main fabric on top of trim matching cut/torn edges, right sides together. (wrong side up)

5. You should now have four layers of fabric, the hem and main fabric sandwiching the trim piece between them. Pin all four layers together.

6. This is where it gets a little tricky! Gently roll the main fabric towards the pinned edge, just like you would if you were making cinnamon rolls.

7. Fold hem fabric OVER the rolled up main fabric, matching cut/torn edges and re-pin. You should have five layers pinned together in a nice little tube! Make sure the rolled main fabric is at least 1" from pinned edge so that it does not accidentally get caught in your seam.
It should look like this:

And this:

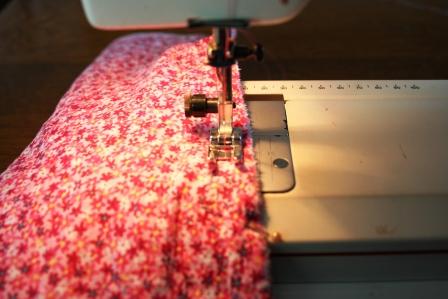
8. Sew along pinned edge (cut/torn) the full length of tube, taking out pins as you go, and locking stitches at each end. Trim threads.
9. Gently pull main fabric out of tube.


It should look like this on the outside:


And this on the inside:
*note selvages not lining up exactly.

10. Now to finish the side and bottom seams. I'll show you three different ways:
A: Serge! On a large flat surface, fold pillowcase in half, right sides together, matching hem (top) and sides (selvage edge). Starting at hem, sew side seam.

At corner, pivot 90 degrees and sew bottom seam. Locking stitches at each end, trim threads.

Finish seams with serger! The serger will trim off the overage seen in step 9.

Side/bottom seam B: Leave 'em!
Sew side and bottom seams same as version "A",

Instead of running through the serger, trim the corners so they are nice and pointy when you turn it right side out.

"C" The french seam. Very simple. Fold pillowcase in half WRONG sides together, matching hem edges and side seams (selvage edge). Sew down down side seam, pivot at corner and sew bottom seam. Make sure to take a 1/4" seam here! Trim corners.

Turn pillowcase wrong side out, shake out and smooth down seam. Iron.

Sew down side seam and bottom seam- back to 1/2" seams.

Finished seam should look like this:

Turn right side out and enjoy!

If you have any questions/comments, or if something seems a little funky, send me an email, and I'll try to help you out!
3 to leave a comment, click HERE:
Looks like a fun little project, maybe I'll give it a try. -Celeste
@Anonymous
I just finished making this pillow for my granddaughter whose favorite color is purple. I found a small purple print, and a contrasting print, and a subtle print in darker purple for the trim piece. I then used this same darker purple to cut out an "M" and sewed it to the center of the pillow. I was pleased with the final project and I know my granddaughter will like it, too.
That sounds really cute!
Purple is one of my favorite colors too.
The applique is a really good idea I may have to borrow!
Thanks for stopping by~
Sarah
Post a Comment